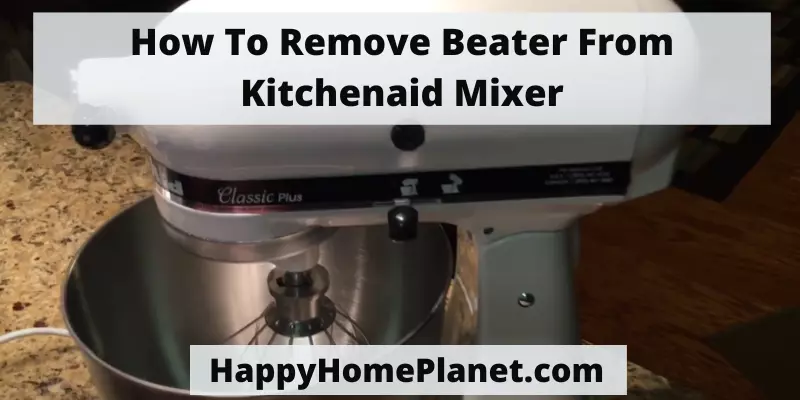
A Kitchenaid mixer performs some essential mixing jobs in the kitchen. You can make whipped cream, cake batters, and dough with it. However, many consider removing the Kitchenaid mixer beaters challenging, especially when it gets stuck. Therefore, knowing how to remove the beater from the Kitchenaid mixer is crucial.
Kitchenaid is one of the most popular mixers in the market. Therefore, it is reasonable to follow a single method to dispel the beater from the mixer. Keep reading this article while you are looking for the best practice and transparent idea. This article will show you how to remove it and share some relevant tips.
Table of Contents
- 5 Steps To Remove Beater From Kitchenaid Mixer: A Home-Remedy
- Step 1: Consider The Removability Of The Beater
- Step 2: Unplug The Mixer
- Step 3: Take Aside The Metal Clip
- Step 4: Remove The Beater
- Step 5: Clean The Beater
- 5 Mistakes You Should Avoid When Removing Beater From Kitchenaid Mixer
- 1. Not Plugging Out The Mixer
- 2. Pulling Beaters Forcibly
- 3. Not Using Any Tools When Necessary
- 4. Not Determining The Beater Removability
- 5. Careless About The Instruction Manual
- 5 Tips To Remove Beater From Kitchenaid Mixer:
- Tip 1: Do Not Pull Forcibly
- Tip 2: Remove Beater Shaft
- Tip 3: Loosen The Back Screws
- Tip 4: Get Professional Help
- Tip 5: Attach Properly For The Next Removing
- Related Questions Of Removing Beater From Kitchenaid Mixer:
- How Do You Open A Kitchenaid Hand Mixer?
- Is It Possible To Replace The Carbon Brushes On A Kitchenaid Stand Mixer?
- Can You Remove Beater From The Kitchenaid Mixer Without Tools?
- How Do You Remove A Beater From The Kitchenaid Mixer Head?
- How Do You Take The Stand-Off A Mixer Hand?
- Final verdict:
5 Steps To Remove Beater From Kitchenaid Mixer: A Home-Remedy
The beater must be separated from a mixer to clean it. Also, if it gets stuck in unintentionally, it can interfere with your work. Follow these simple steps to remove beater from kitchenaid mixer.
Step 1: Consider The Removability Of The Beater
First, you must determine if the beater is removable from the mixer. The Kitchenaid mixer beater is usually removable if it snaps to the alloy with a metal clip. Then you can remove it.
Many beaters run through the center of the mixer because it is attached to the shaft. In that case, it is possible to dispel the part yourself. Of course, it should be taken to a professional.
Step 2: Unplug The Mixer
Once the beater is removable, start your original work from here. First, unplug the mixer, so there is no electrical connection. After making sure that all the buttons are off, disconnect it from the power source.
Keep in mind that working with a mixer while having a plugin can be a risk factor. In addition, it can be turned on during work.
Step 3: Take Aside The Metal Clip
Your Kitchenaid mixer may have a metal clip on the beater shaft. It must be removed before taking aside the beater as the clip holds it. You can use a pair of pliers to move the clip.
Pliers usually help to remove the clips and pull the beaters out of the shaft. When doing this, keep in mind that it should not be damaged.
Step 4: Remove The Beater
After disconnecting the power from the mixer, you can now start moving the beater. Hold it by hand and pull them out of the shaft of the mixer. When pulling it out, notice if it is coming out easily.
Pull with a little force. In case it is hard to get out of it, maybe it’s not your job. Perhaps, you did not pay attention to the beater removability test initially.
Step 5: Clean The Beater
Finally, you have to clean the part you have detached. With a toothbrush, you can clean all the dirt. Beater’s dirt means food residue because it deals with anything other than food.
Shake off any food particles stuck in it. Also, clean the metal clip because you are unsure if it has any food left over.
5 Mistakes You Should Avoid When Removing Beater From Kitchenaid Mixer
Many people make mistakes when it comes to removing beaters from the Kitchenaid mixer. These mistakes should be considered as they can be detrimental to your tool.
1. Not Plugging Out The Mixer
Do not attempt to remove the beater when your mixer is in an electric connection. Many people make this mistake because they don’t care about it. Doing so can lead to two types of problems.
The mixer can be turned on at the time the beaters are being removed while plugged in. The second problem is that the mixer may have a technical problem, so it can be electrified, which is dangerous. Therefore, make sure it is plugged out.
2. Pulling Beaters Forcibly
You may think it is prevalent to take the beater from the Kitchenaid mixer aside. Yes, this is easy in some cases. When the beater is not coming out typically, you probably insist on the biggest mistake.
This can ultimately damage the beater. Even your mixer can get harmed. So, it will not come out even after pulling, and a professional can deal with it. He can give you an easy solution to removing the beaters.
3. Not Using Any Tools When Necessary
It is foolish to think that you can permanently remove the beater from the mixer by hand. You can have some essential tools like pliers or screwdrivers on hand. When buying a mixer, people often do not realize what a beater removal system is.
Some models of KitchenAid mixers require the use of a screwdriver to remove the beater as it can contain metal clips. You will not be able to open the necessary screws by hand. So, keep some things in the collection.
4. Not Determining The Beater Removability
This is a crucial point that you can miss in the beginning. It is necessary to verify whether the beater of the mixer is removable. Moreover, in some models, it has to be removed even after opening a few screws.
First, you need to consider the model. When you fail to diverge the beater easily, it will need to be repaired. Take it back to where you bought it while it was guaranteed.
5. Careless About The Instruction Manual
Each item comes with an electric Kitchenaid mixer and an instruction manual. It describes all the ways to diverge the beater from the mixer. You must read it thoroughly. Many people do not notice the excitement of using and removing a mixer.
You can reach your desired goal by following the steps in the guide. Since it guides a user in using a mixer, it will also tell you how to overcome various problems.
5 Tips To Remove Beater From Kitchenaid Mixer:
Here are some tips to help you separate beaters from Kitchenaid mixers. These are small things but important because they will help you avoid some potential mistakes.
Tip 1: Do Not Pull Forcibly
If the beater is stuck and does not want to come out after you apply the correct method, do not pull hard. Maybe there’s a problem with it, try to find it. Otherwise, both the beater and the mixer can be damaged.
Tip 2: Remove Beater Shaft
Some Kitchenaid mixers have a shaft that can be easily removed. If your mixer is of this model, you can diverge the shaft with the help of a screwdriver. This will make it easier to diverge the beater.
Tip 3: Loosen The Back Screws
The usual beat removal procedures should be tried before you. If the shaft is not removable, it is useless to try here. In this case, after removing the mixer head, loosen the screws behind it. It is pretty effective in removing the beater.
Tip 4: Get Professional Help
When you have no confidence in removing the stuck beaters, and it has a warranty, take it to a service center. Hopefully, the professionals will be able to give you the solution in the quickest time.
Tip 5: Attach Properly For The Next Removing
Removing the mixer beater just once is not enough. Remember it needs to be removed again for the next cleaning. So, first, attach the beater properly. Otherwise, it will get loose and stick.
Related Questions Of Removing Beater From Kitchenaid Mixer:
How Do You Open A Kitchenaid Hand Mixer?
There is an easy and effective way to open the Kitchenaid hand mixer that will satisfy you. Just a few steps will allow you to complete the task successfully.
First, unplug the mixer from the power source, then open the top nut with a screwdriver. Loosen the top back cover. Now, slightly hit the nut on the front of the mixer with a hammer.
After the nut comes out, clot with light pressure with two screwdrivers, then remove some nuts on the motor side. Finally, the space you need to clean up is now open to you.
Is It Possible To Replace The Carbon Brushes On A Kitchenaid Stand Mixer?
A much significant part of the stand mixer is the carbon brush. This can sometimes be eroded as the tool continues to work. So you should know how to replace it. In just a few simple steps, you can remove the brush. Open the large nut in the middle of the stand mixer with a screwdriver
The carbon brush will come out when pulling it, put it in another place. Then, put the other parts in a different place. It is time to set the new brush in the right place. Finally, put the large nut in the previous place and attach it.
Can You Remove Beater From The Kitchenaid Mixer Without Tools?
Based on the Kitchenaid model you can remove the Beater from the mixer without any tools. Some removal methods come with several simple steps that can be done by hand. In this type of mixer, the beater is rotated with only a thick knot.
To dispel the beater, plug out the mixer. Also, hold it by hand and lightly push it forward. Then turn left once and bring it out. You do not need any tools.
How Do You Remove A Beater From The Kitchenaid Mixer Head?
To remove the beater from the mixer head, you should find the shaft under its head. Next to it, you will find an easy-to-use lever with which to unlock the head. Then tilt the head back.
Remove the metal clip (if any) while the tool is securely tilted to the back and rotate the beater counterclockwise. One will have to slowly move away from the original place and eventually be removed entirely.
How Do You Take The Stand-Off A Mixer Hand?
To take off the mixer hand, you should first hold it with your hand. Do not hold it lightly, as it can move abruptly and cause injury. Pull it by pressing the release button on the mixer. It will gradually separate from the stand.
You do your job after being separated. The purpose of detaching the stand of a mixer hand is to clean it. So after cleaning, you must dry it well and attach it again.
Final verdict:
Therefore, now you know how to remove the beater from the Kitchenaid mixer. Getting rid of a beater mixer means you get a chance to clean or repair it. Although there are multiple reasons for removing the beater, it is still dispelled primarily for cleaning purposes.
However, from this article, you also learned about some potential mistakes. These will definitely help you to keep your mixer and beater intact.